
Granite Core
or at least, How I Made the 2009 Hugo Base
For those of you wondering just what all went into making these shiny heavy lumps, here you go!
When I was thinking of entering Anticipation's contest, I had a general idea in mind. Many of the previous years' Hugo bases, both good and bad, had been all about being something on which a trophy could sit. While that is kind of important, I was trying to figure out how to come up with something on which a rocket would sit. Real rocket ships aren't usually found sitting on a block of wood, or a film reel, or such. I was looking for something like a launch pad, or futuristic hanger, or some way of putting it 'in space.'
Anticipation's contest guidelines said that it was not necessary to actually fabricate a prototype, a description was adequate. However, when the figurative lightning struck and the whole asteroid idea hit, I instantly recognized that it would be nearly impossible to describe what I had in mind in such a way that it would be clear to the judges. Heck, even photographing the real thing is tremendously difficult and only somewhat successful. So I had just over three weeks to write up my proposal, create the prototype, and get the whole package to Canada. I might not have been quite so concerned if I'd ever worked with granite before.
I was planning to use granite from Quebec. There are a number of quarries in the province, and I knew that they’d have a certain amount of stone that would shatter or crumble while they were mining it. All I’d need was a sympathetic staff member at the quarry to agree to shovel a bunch of their scrap into a box. Much cheaper than buying granite “retail,” or so I figured.
So, with a plan for getting granite, the next question was how I would then shape these chunks into the lumpy-but-with-a-flat-shiny-top asteroid shapes that I wanted. “Who can I talk to,” I wondered, “who could give me some good advice on how to shape granite?” Now, as with most cities, there are plenty of companies in the phone book listed under “granite,” but the vast majority of them are doing countertops. They know how to slice it, and how to shape the edge all smooth and shiny, but I rather doubted they’d have much experience working with dimensional stone, especially since I wanted to make it unshiny.
{Ding!} Of course! I headed over to a company that’s just a handful of blocks from my house: Quiring Monuments, the largest tombstone company in the Pacific Northwest. They turned out to have two invaluable suggestions. One involved shaping the stone. Yes, a hammer and chisel would probably work, but if I was trying to get a “natural” look, I should first try using a blowtorch.
Say what? This is stone that was formed in a volcano! What effect could a blowtorch have on it?
Stress fractures. Apply heat to part of the rock, and it would expand and crack. Acetylene torches can get to 6,000°K, but they’re also expensive. A hand-held propane torch is very affordable, but only gets to around 1,800°K. But you can use a handheld “propane” torch with Mapp gas as well, and Mapp gas can provide a 4,100°K flame.
The other thing I got from Quiring was . . . my granite! I knew that even “free” Quebecois granite was still going to be appallingly expensive to ship to Seattle. The folks at Quiring mentioned their ‘scrap granite’ bin. You see, lots of people like to have a flower vase in the cemetary by the gravestone. These are usually stored upside-down in a cylinder that’s mostly underground. In order to mount the vase, Quiring would take a granite tile twelve inches on a side and three or four inches thick, and cut a circle right through where the vase would go. The cylindrical ‘core’ was scrap granite; too small for them to use for anything. So they’d throw those scraps into a bin behind the company and let people just carry them off. That way they didn’t have to pay to have them hauled off as garbage.
These cores were almost exactly the diameter I’d planned, about the right thickness, and they came with the top surface already all polished and ready to go. Perfect! The only downside was, none of the granite they used was from Canada. Nevertheless, free recycled granite was too good a deal to pass up.
Here’s what one of the cores looks like before I’ve started working on it.

My tools: the blowtorch with handy piezoelectric starter, and my special-for-granite hammer and chisel from Trow and Holden. The chisel has an ultra-hard silicon carbide insert on the tip. I’ve flipped the rock upside down to start rounding off the bottom.

Heating it up.

You can clearly see the crack running around the right side of the upper surface. Usually, when I’d torch the smooth cut surface, tiny specks of rock would go “crackle, pop!” and burst off the stone. Having red-hot specks of granite shooting around the room is why I did all my work outside in the back yard; and wore eye protection, thick insulated work gloves, and long sleeve shirts. Yowch!

Once I had the general shape, I’d start working with the hammer and chisel. More than once, I’d suddenly feel like Michaelangelo or Rodin or the like, carefully placing my chisel and rapping it with the hammer as I worked on the rock.

Once I had it looking like an asteroid, I’d send it back to the monument company to have the circular well sandblasted into place.

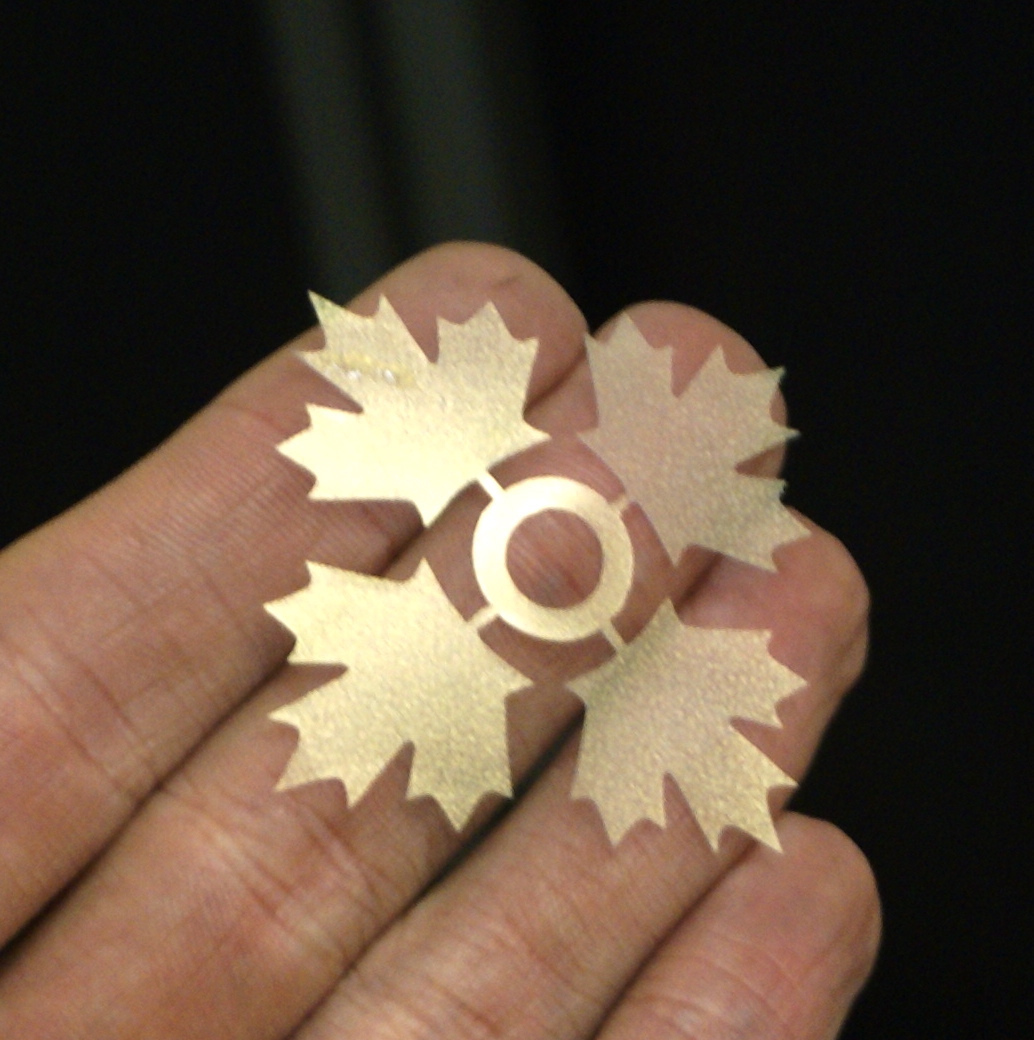
Picking out the non-leaf partsWhile I was making asteroids, I was also making rocket flames, taking advantage of some of the nifty tools at PlastiCreations, the domed label company where I worked part-time. In particular, the computer controlled vinyl cutter. I had the machine cut out the quad-maple-leaf pattern in four different sizes. Then, without peeling anything off the backing paper, I brought them home and carefully airbrushed on iridescent metallic acrylic paint (purchased at Daniel Smith). Spray too fast and the paint will bead up, so it’s kind of tricky. Once it was dry, I peeled off everything that wasn’t maple leaves, then set them aside until I was ready for them.
In my original design, I had deliberately planned to not have any maple leaves on the base. This would be the third time WorldCon had been in Canada, and the previous two bases had basically been giant wooden maple leaves. "Enough with the leaves!" I thought. "Canada's got more going for it than just an unusually distinctive flag, for crying out loud."
When I sat down at my computer to figure out what shape to use for the rocket flames, I'd already changed plans on the granite, so I knew that my original plan for including something distinctly Canadian was out. I'm sketching out various shapes to find something that looked like it would come from a rocket engine, and after one test, I think "hmm, the flames need to be pointy-looking." {ding!} "Well. Drat. Yea, that stupid old maple leaf would, in fact, be a really appropriate shape for the rocket flames. Fine, fine. OK, leaf, you win. You can be the 'Canadian thing' in my Hugo base."

The rocket itself comes with a threaded hole in the bottom for mounting. I needed to provide a bolt or rod for that hole. Once the base was back from sandblasting, it was time to drill a small hole down the center. This would be where a threaded rod would go that's used to hold the rocket onto the base.

If I hadn't ordered it myself, I would never have guessed that this thingamabob was designed to drill a 3/8" hole in granite at a rather astonishing rate.
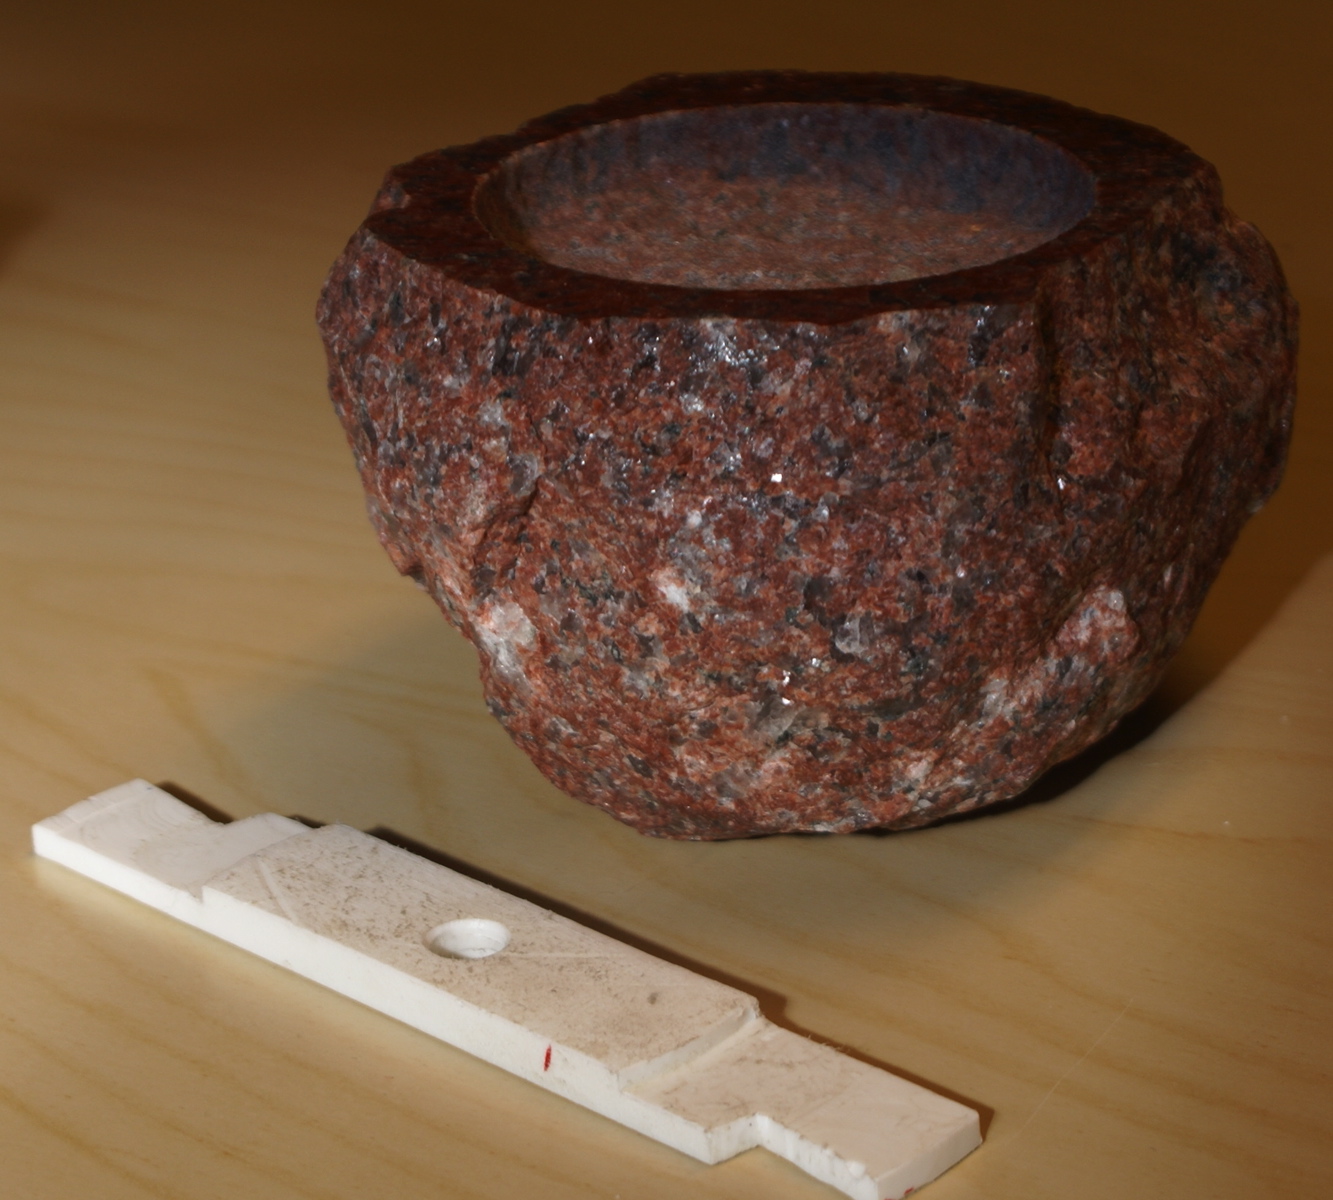
 I made a special template to help me find the center of the pit.
I used the template to make sure my drill press was lined up,


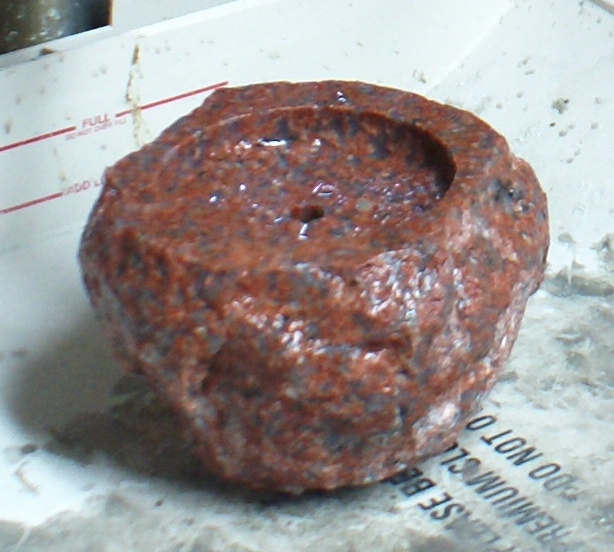 then poured water into the pit. I would pump the drill bit up and down while drilling to get fresh water to circulate around the bit and keep it cool while I was boring in, and often had to take the bit off and poke at granite that had snapped off inside the bit, but even with those interruptions, I could usually drill a pit 1.5cm deep in about two minutes. Once that was done, I’d set them aside to dry.
I’d bought some threaded rod of the right size at the hardware store and chopped it into pieces about 5cm (2 inches) long.


I made some plastic bars with a threaded hole to hold the rod precisely perpendicular to the surface. To fasten the rods into the holes, I used quick-set epoxy, which did an outstanding job of bonding the rod into the granite hole.


In order to keep the rod from being visible under the rocket, I either slipped some black shrink wrap tubing over the rod, or, for the bases that weren’t Blue Pearl, I spray-painted the entire blast pit black.
Now it was time to start bringing everything together. I mentioned “domed labels” earlier. A domed label is one that has a clear polyurethane dome over the printed part. I used the same polyurethane to fill in the blast pit and suspend the leaves. The polyurethane hardens when two components are mixed, triggering a catalytic reaction. I could have used a number of different things to fill in the blast pit, but besides using at least one thing on this project that I'd actually worked withe before, the polyurethane is astonishingly durable. Although you can't really tell when it's in a granite pit, it's rather flexible and rubbery. It's also extremely resistant to solvents. The rubbery quality means it's much harder to scratch than, say, acrylic would be, and temperature changes won't crack it, or cause it to crack the granite.

The first step is to pour in enough polyurethane to cover the bottom and provide a flat surface on which to float the first rosette. The bottommost rosette is the largest, and it's magenta in color.

Once that layer has had a chance to gel a bit, I can pour another layer of polyurethane, and place the second rosette, which is copper in color. I had to gently lower the rosette in place over the threaded rod, and then carefully nudge it into position, making sure all the leaves were stretched out flat and even.

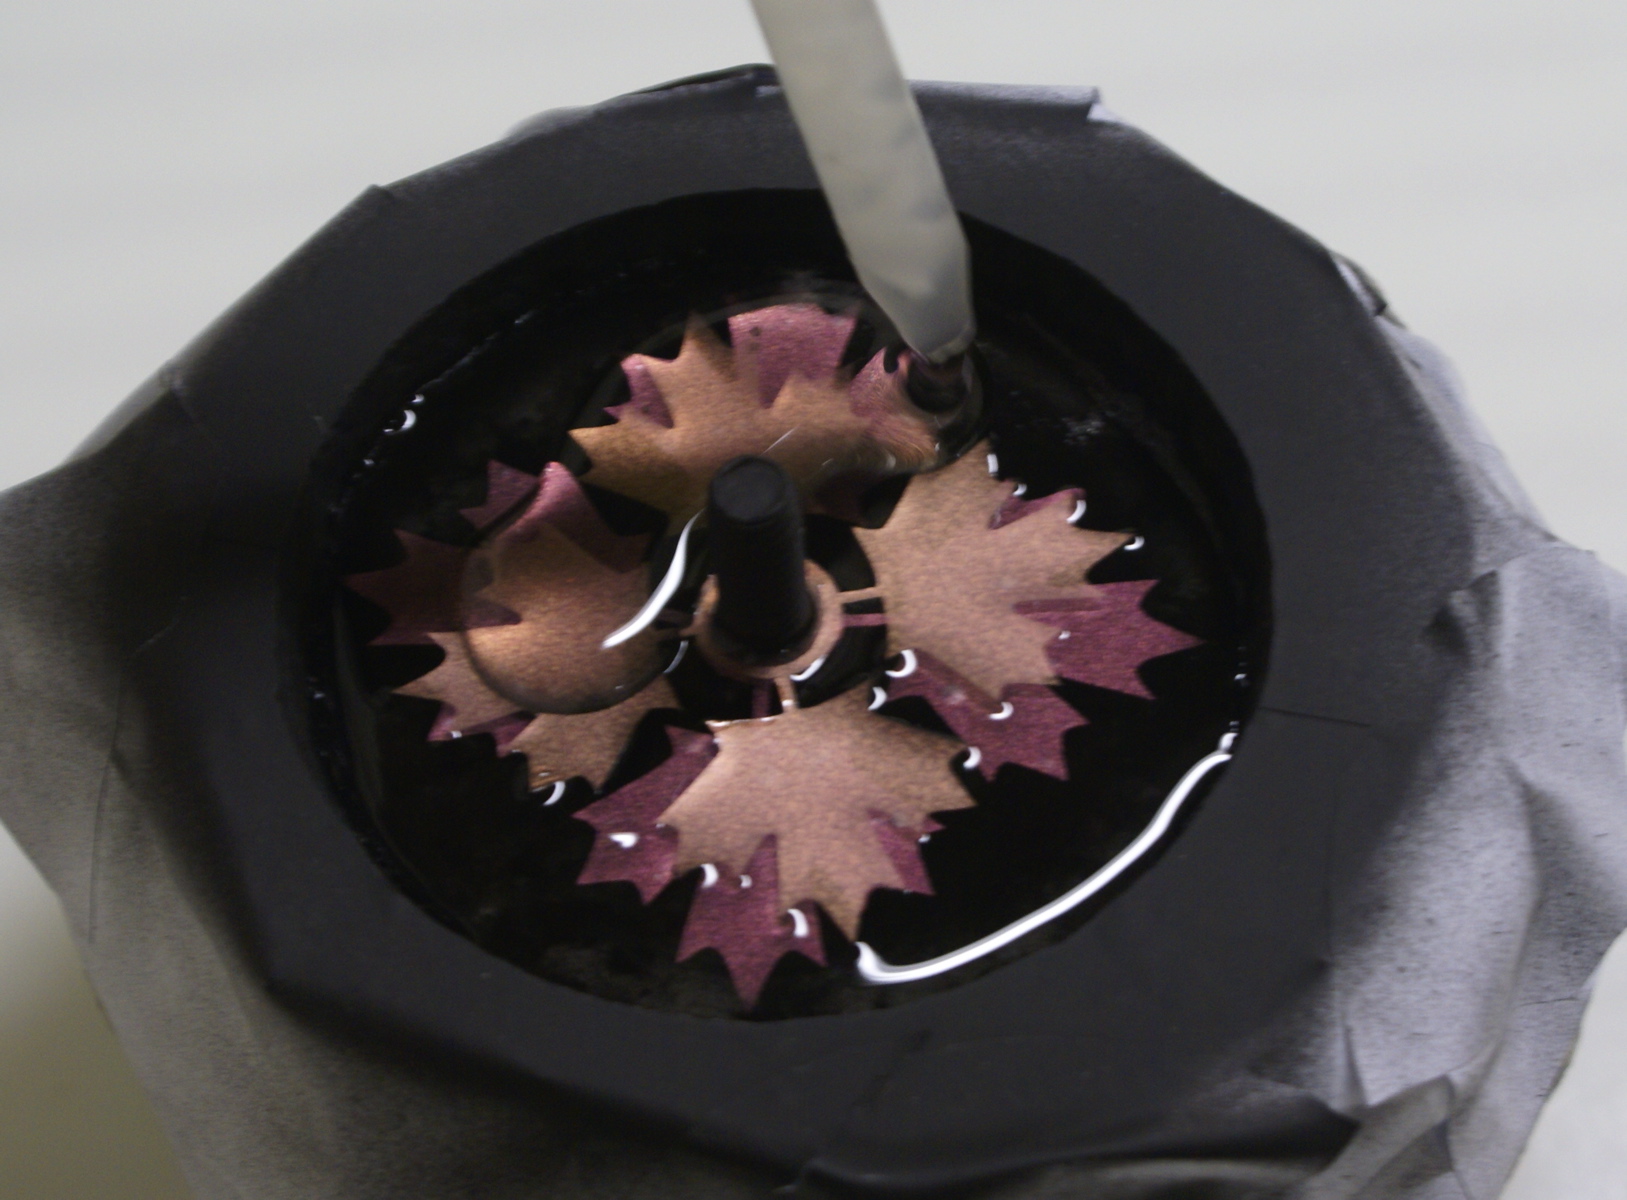

These pictures show me adding the third layer of polyurethane, in order to add the gold rosette.
Both the points of the leaves and their super-spindly stems made handling the rosettes very tricky. Everything wanted to just flop around and twist. Keeping them floating on the surface of each layer of plastic required patience.
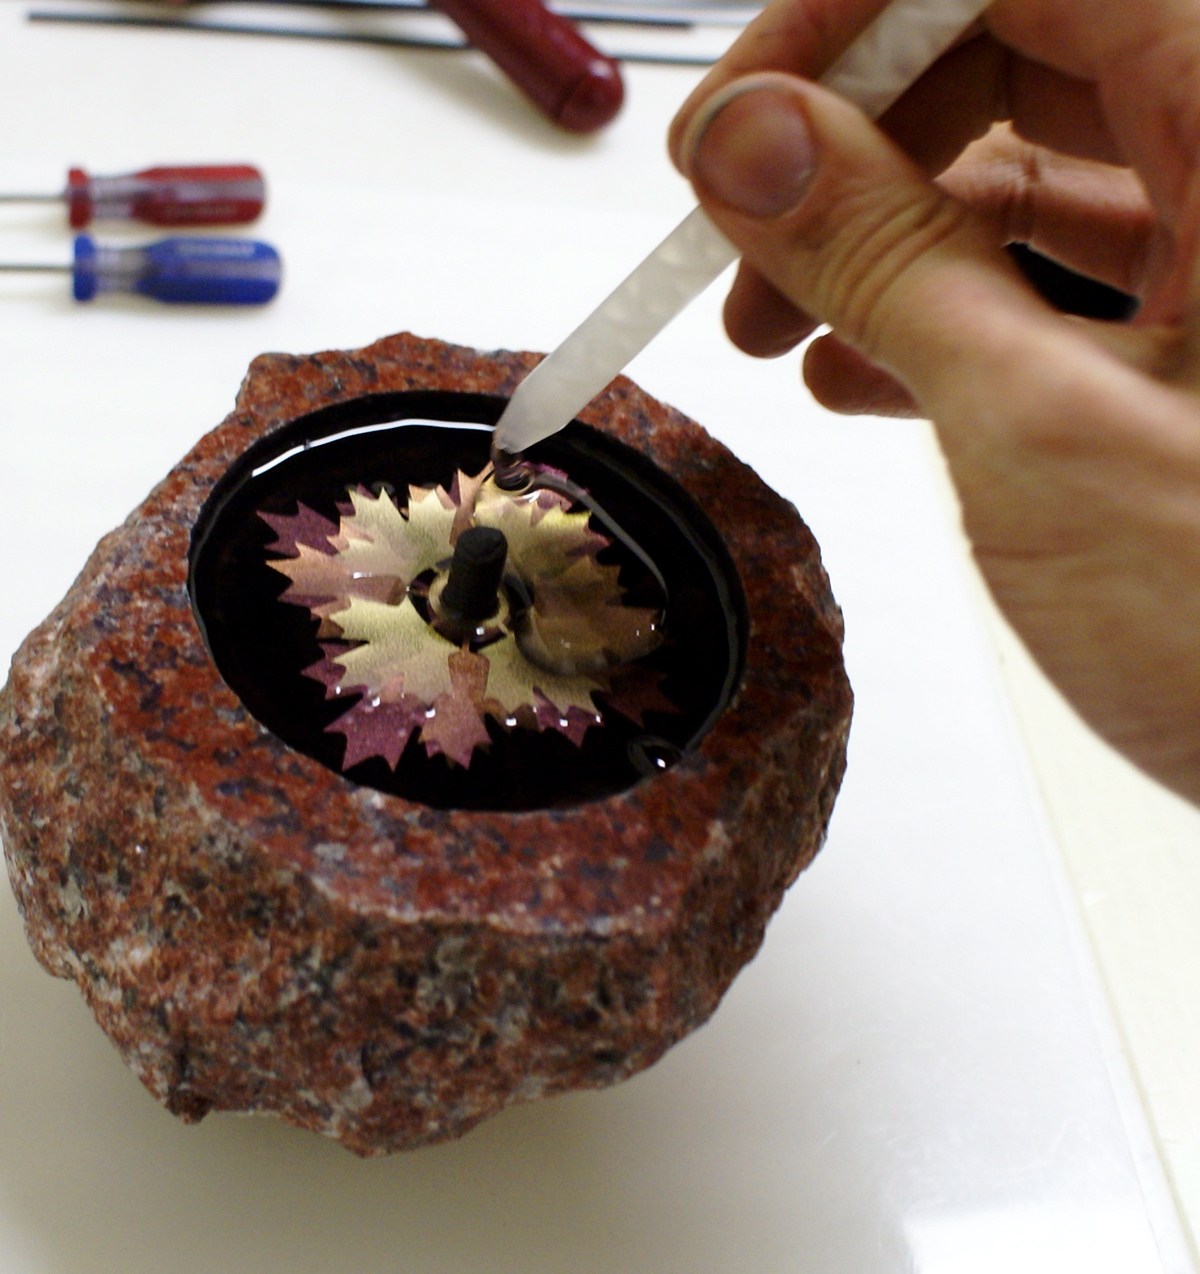

And, as before, once the layer underneath the gold rosette had started to firm up, I could pour another layer on for the silver final rosette.

You can see how the silver rosette is floating on the surface of the plastic.

Pouring the last layer to embed the silver rosette was particularly touchy, since the intention was to end up with as flat and smooth a surface as possible. I poured the plastic slowly to try to get as close to "full" without going over as possible.


The top picture shows that I probably have enough plastic, it just hasn't spread evenly. I could fix that by using a small stick to coax the plastic to finish flowing up to the edge.


My last two bases are almost finished, and ready to cure.

After giving the last layer a few minutes to thicken up, it's time to carefully transfer the bases into our "hot box" which would keep them at around 120° F (50° C) overnight to let the polyurethane finish setting up.
The plaques that 'float' in front of the base are mounted by having them grab onto vertical slots cut into the side of the base. Usually I cut these before sending the bases off to sandblasting, but sometimes it was done later. For the base featured in most of these photos, the slots were cut after the rosettes were in place.

Carefully getting a slot started. For most of the bases, I'd done this work with a fixed saw and a jig to help me make sure that the slots were perpendicular to the bottom, pointed toward the center, and were 180 degrees from each other, but I had to cut the last few by hand. I'd rebuilt my tile saw in order to cut the granite, mounting it sideways at one point to help cut some larger pieces, and water had snuck into the housing and destroyed one of the bearings. You can clearly see in this picture, right where the blade is touching the rock, how the granite immediately becomes red-hot from the friction.

Which is why, once I had the slot started, I would reposition the base so I could keep the stone wet while I was cutting. That's my squirt bottle in the foreground.

Almost done! Time for the finishing touch; a lovely formal green felt on the base to keep the rock from scratching up the mantlepiece (or wherever winners ended up putting their trophies). The felt and rock base were covered with contact cement, and stuck together.
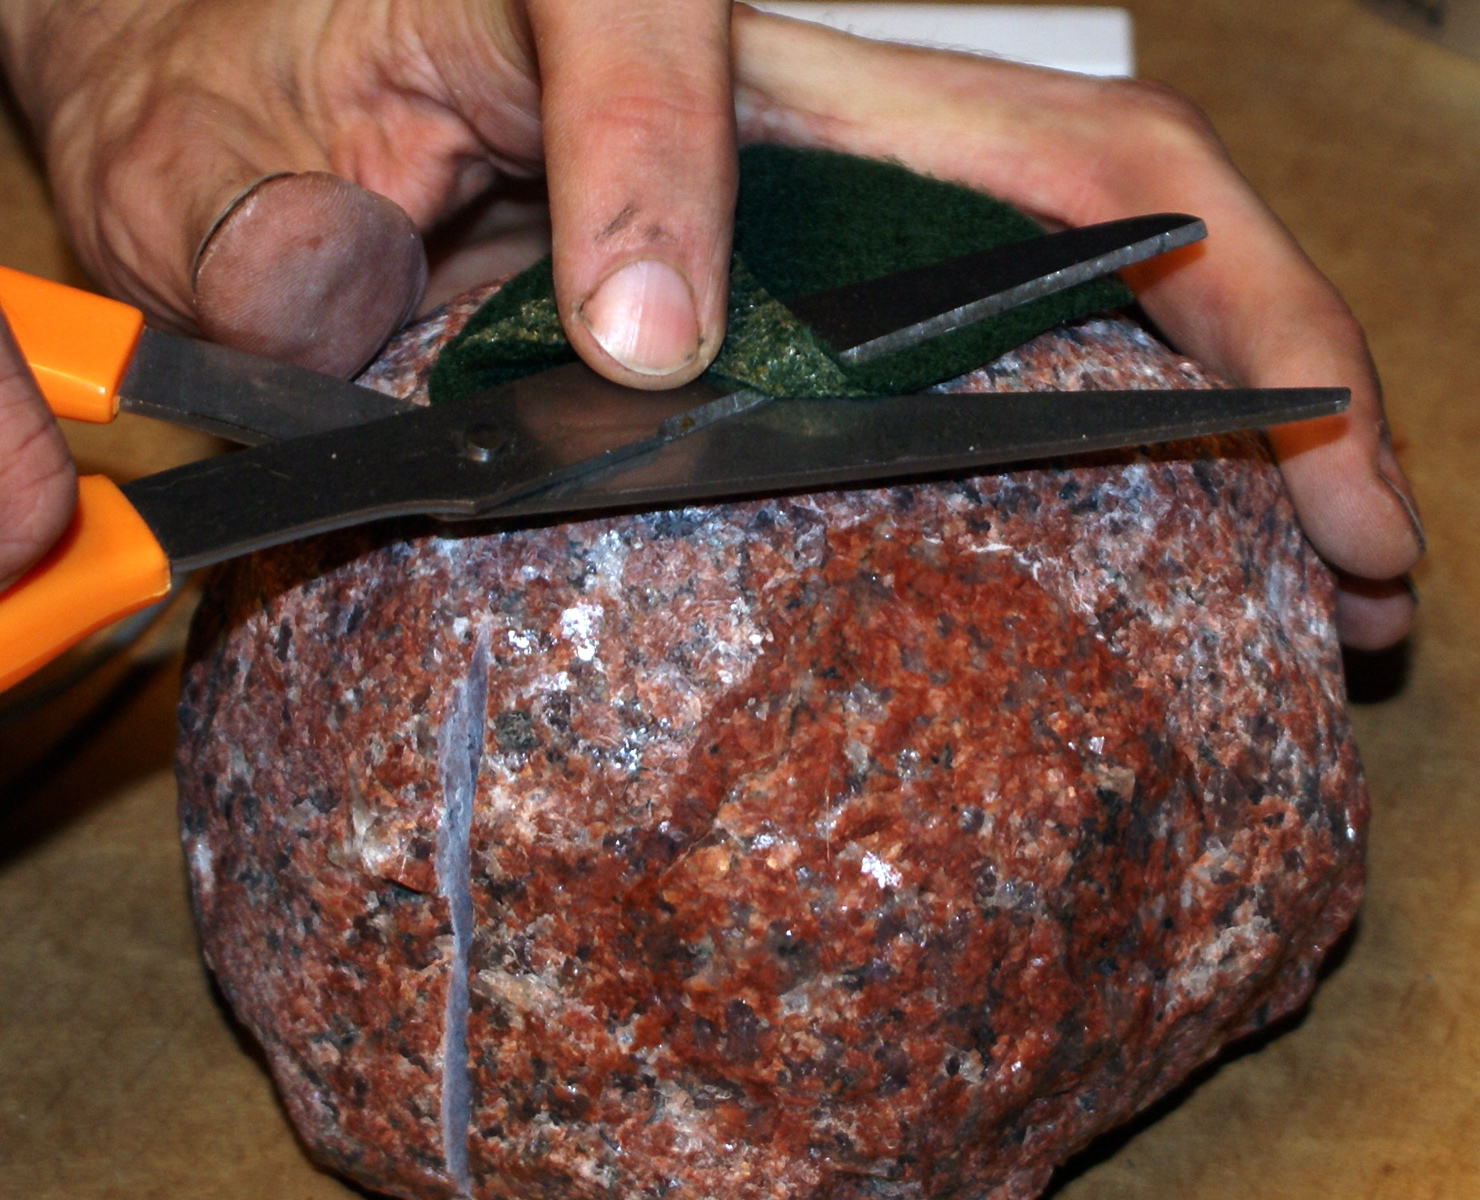
Once the felt was in place, I trimmed it back to match the profile of the flat bottom of the base. Each base's footprint was unique, obviously. One or two were almost too small; the bases were a little unstable if placed on a softer surface. As long as they're sitting on something hard and flat, they're fine.

After trimming the felt, I signed and dated each one. As I later confirmed, signing them was unusual but not unprecedented. If they’d all been identical, I probably wouldn’t have, but with all the hammering and chiseling, and me holding each one up and going “Hmm, does it look like an asteroid yet? Maybe a little more off over here...,” I really had come to feel like I was making lumps of art, so putting my initials on each one didn’t seem inappropriate, especially since I was putting them on the bottom where they wouldn’t normally show. Also on the base was an arrow indicating which side was the front. When I was sculpting them, I would almost always reach a point where the base was looking pretty good, but would definitely have a 'good side.' I would put extra time and effort into making one particular angle look as irregular and 'asteroid-y' as possible, and not work too hard on the 'back' side. Besides saving me time, it also reduced the chance of the rock splitting more than I'd intended and making the top side too small to sandblast. I did lose one base because the rock cracked too much.
 The Hugo Committee handled having the plaques made, so I didn't even get to see them until less than 24 hours before the trophies were awarded. Originally, I'd expected I wouldn't see them until after they were awarded, but once I reached the convention, I found out that the engraver had not bent the plaques into semi-circles like I'd planned. I spent about half an hour one evening at the convention running around backstage trying to find somebody with a roll of tape they'd used up but hadn't thrown away yet. I wanted the core; the cylinder of cardboard in the center.
Luckily for this web page, I knew before I left for WorldCon that we would not need every base that the committee had originally ordered. As I mentioned on the main page about the bases, there'd been some last-minute complications. Knowing that we only needed 25 or so of the 30 bases they'd originally ordered was a godsend; not quite so many rocks to have ready, and fewer to haul to the convention. Since the Foglios won for "Best Graphic Story," and they live in the same city I do, I proposed to the committee that, instead of sending complete bases back from Montreal to Seattle, they could just give me the plaques and the rockets. Once I got home, I'd finish up the last couple of bases, assemble them, and take them over. Saved quite a bit on shipping!
The first picture in this section shows the tape core that I repurposed into a bending jig for the plaques, the three plaques, and one of their bases.

Because the slots that the plaques grabbed onto were cut with a circular blade, the bottom of the slot was an arc. Trimming the square ends of the plaques to more closely fit the slot helped them stay in place. The plaques were fairly thin aluminum, so they could be cut with shears, or (in the background) ground to shape with a small grinder.


I cut a slot into the core for the end of the plaque. Then it was just a matter of carefully rolling it up in order to put a nice smooth arc into the metal.
 One last little step, and it's done! Whew! The total time per base was between three and five hours. Some took longer to sculpt, and the batch at the end ate up a lot of time because I had to figure out why bubbles were suddenly appearing in the polyurethane. One base (which I still have in my basement) foamed so badly that the blast pit is actually spongy and bouncy. It's also bulging upward, and you can hardly even see the rosettes. But, it all worked out in the end.
